
Hi y'all,
I just need someone to tell me what this process is called. Or direct me to some tutorials that would teach me. I'm not asking anyone to fully explain the process. I'm sure it's not simple.
I'm self taught. And mostly use blender for 3d modeling for 3d printing.
Im always trying to challenge myself to learn new techniques/processes in blender. I've been using blender about 2 years and still feel I barely know the tools or which would be useful to me.
I generally approach learning blender :
"I have an idea, how do I do it?"
So I'm learning blender in a haphazard way.
I found starting with beginner-tutorial series to not be very helpful (I started with the donut one) because they were aimed at making digital assets and scenes. Animations. Coloring.
I'm designing for 3d printing. And my art background has made me a decent sculptor so I use that tool the most. That and Boolean.
Although I appreciate starting with full tutorial series, please do not suggest this. I already went through many beginner videos and they really just aren't taylores for 3d printing applications.
I need my models to have high resolution (decently high) geometry for printing. Not just "looking like" they have texture but the mesh actually needs to have that texture topography.
Which brings me to my point. here is an example of what I'm trying to learn to do.
Let's say I sculpt an egg. But it's not perfect. So it's not symmetrical.
Just an egg-like shape. With a decent size amount of triangles.
So we have smooth tapered ends. And lots of curves. And It's a closed mesh shape. Solid.
Okay. Now let's say I want to cover it in scales.
These scales need to run in a specific direction. Let's say like a dragon egg. So vertical. But they need to wrap around the egg shape horizontally and I want them to condense near the top and bottom of the egg. Where it tapers.
Remember my example is not symmetrical. So maybe the egg top is off centered a little compared to the bottom. Or maybe it curves off to the side and droops a bit. (The point is it has uneven bulbus curves. And it's not symmetrical in any way).
Now if I make a disc shape for a single scale , I can manually place it and use shrink wrap but it only works on one axis so it looks weird. It doesn't curve around the egg shape like a real scale would. Even so that's one scale. If I were to cover the whole thing it would take forever. But this approach doesn't work anyway. But also. By using a scale I made, I can sculpt this scale to have a little flare and be more aesthetic than a basic circle disk. So it would be optimal to use a sculpted mesh I made rather than something else. Like a displacement filter image
So I could use a lattice tool. Apply a black and white displacement picture of a scale pattern over it. But we have the same problem. It won't wrap evenly. It only applies on one axis and where the scales should wrap around, they get distorted weird instead of continuing around the egg shape. Plus using a displacement photo isn't as aesthetic as using a scale I sculpted.
I can also use an array to make a ton of the scales in a band. Then I could copy these over and over and move each copy up to make a stack of scales. A hollow cylinder of the scale pattern. And trying to shrink wrap it or something doesn't work since it's just going to shrink on one axis. So making a round cylinder of the scale pattern is not useful. So that's not going to work either.
Now Ive looked into UV wraps. But that appears to be for "coloring" and "fake textures". By this I mean the topography is not changed. It only 'looks" like it has. Great for games or digital scenes. Not great for 3d printing.
Also I am confused by how uv wraps work as it doesn't seem like you can make them for sculpted objects. ?
And how do you get the pattern to match up anyway ?
And they use displacement filter instead. Which is not what I want. I want actual mesh changes. Wrap a mesh around another mesh.
So anyway. Ive seen plenty of 3d print models I'm certain have done what I've given an example of. And yet I can't figure out how this is done.
I've spent a lot of time trying multiple approaches with the ways I listed. And I've watched a ton of videos but none allow for this full texture application that isn't fixed on one axis.
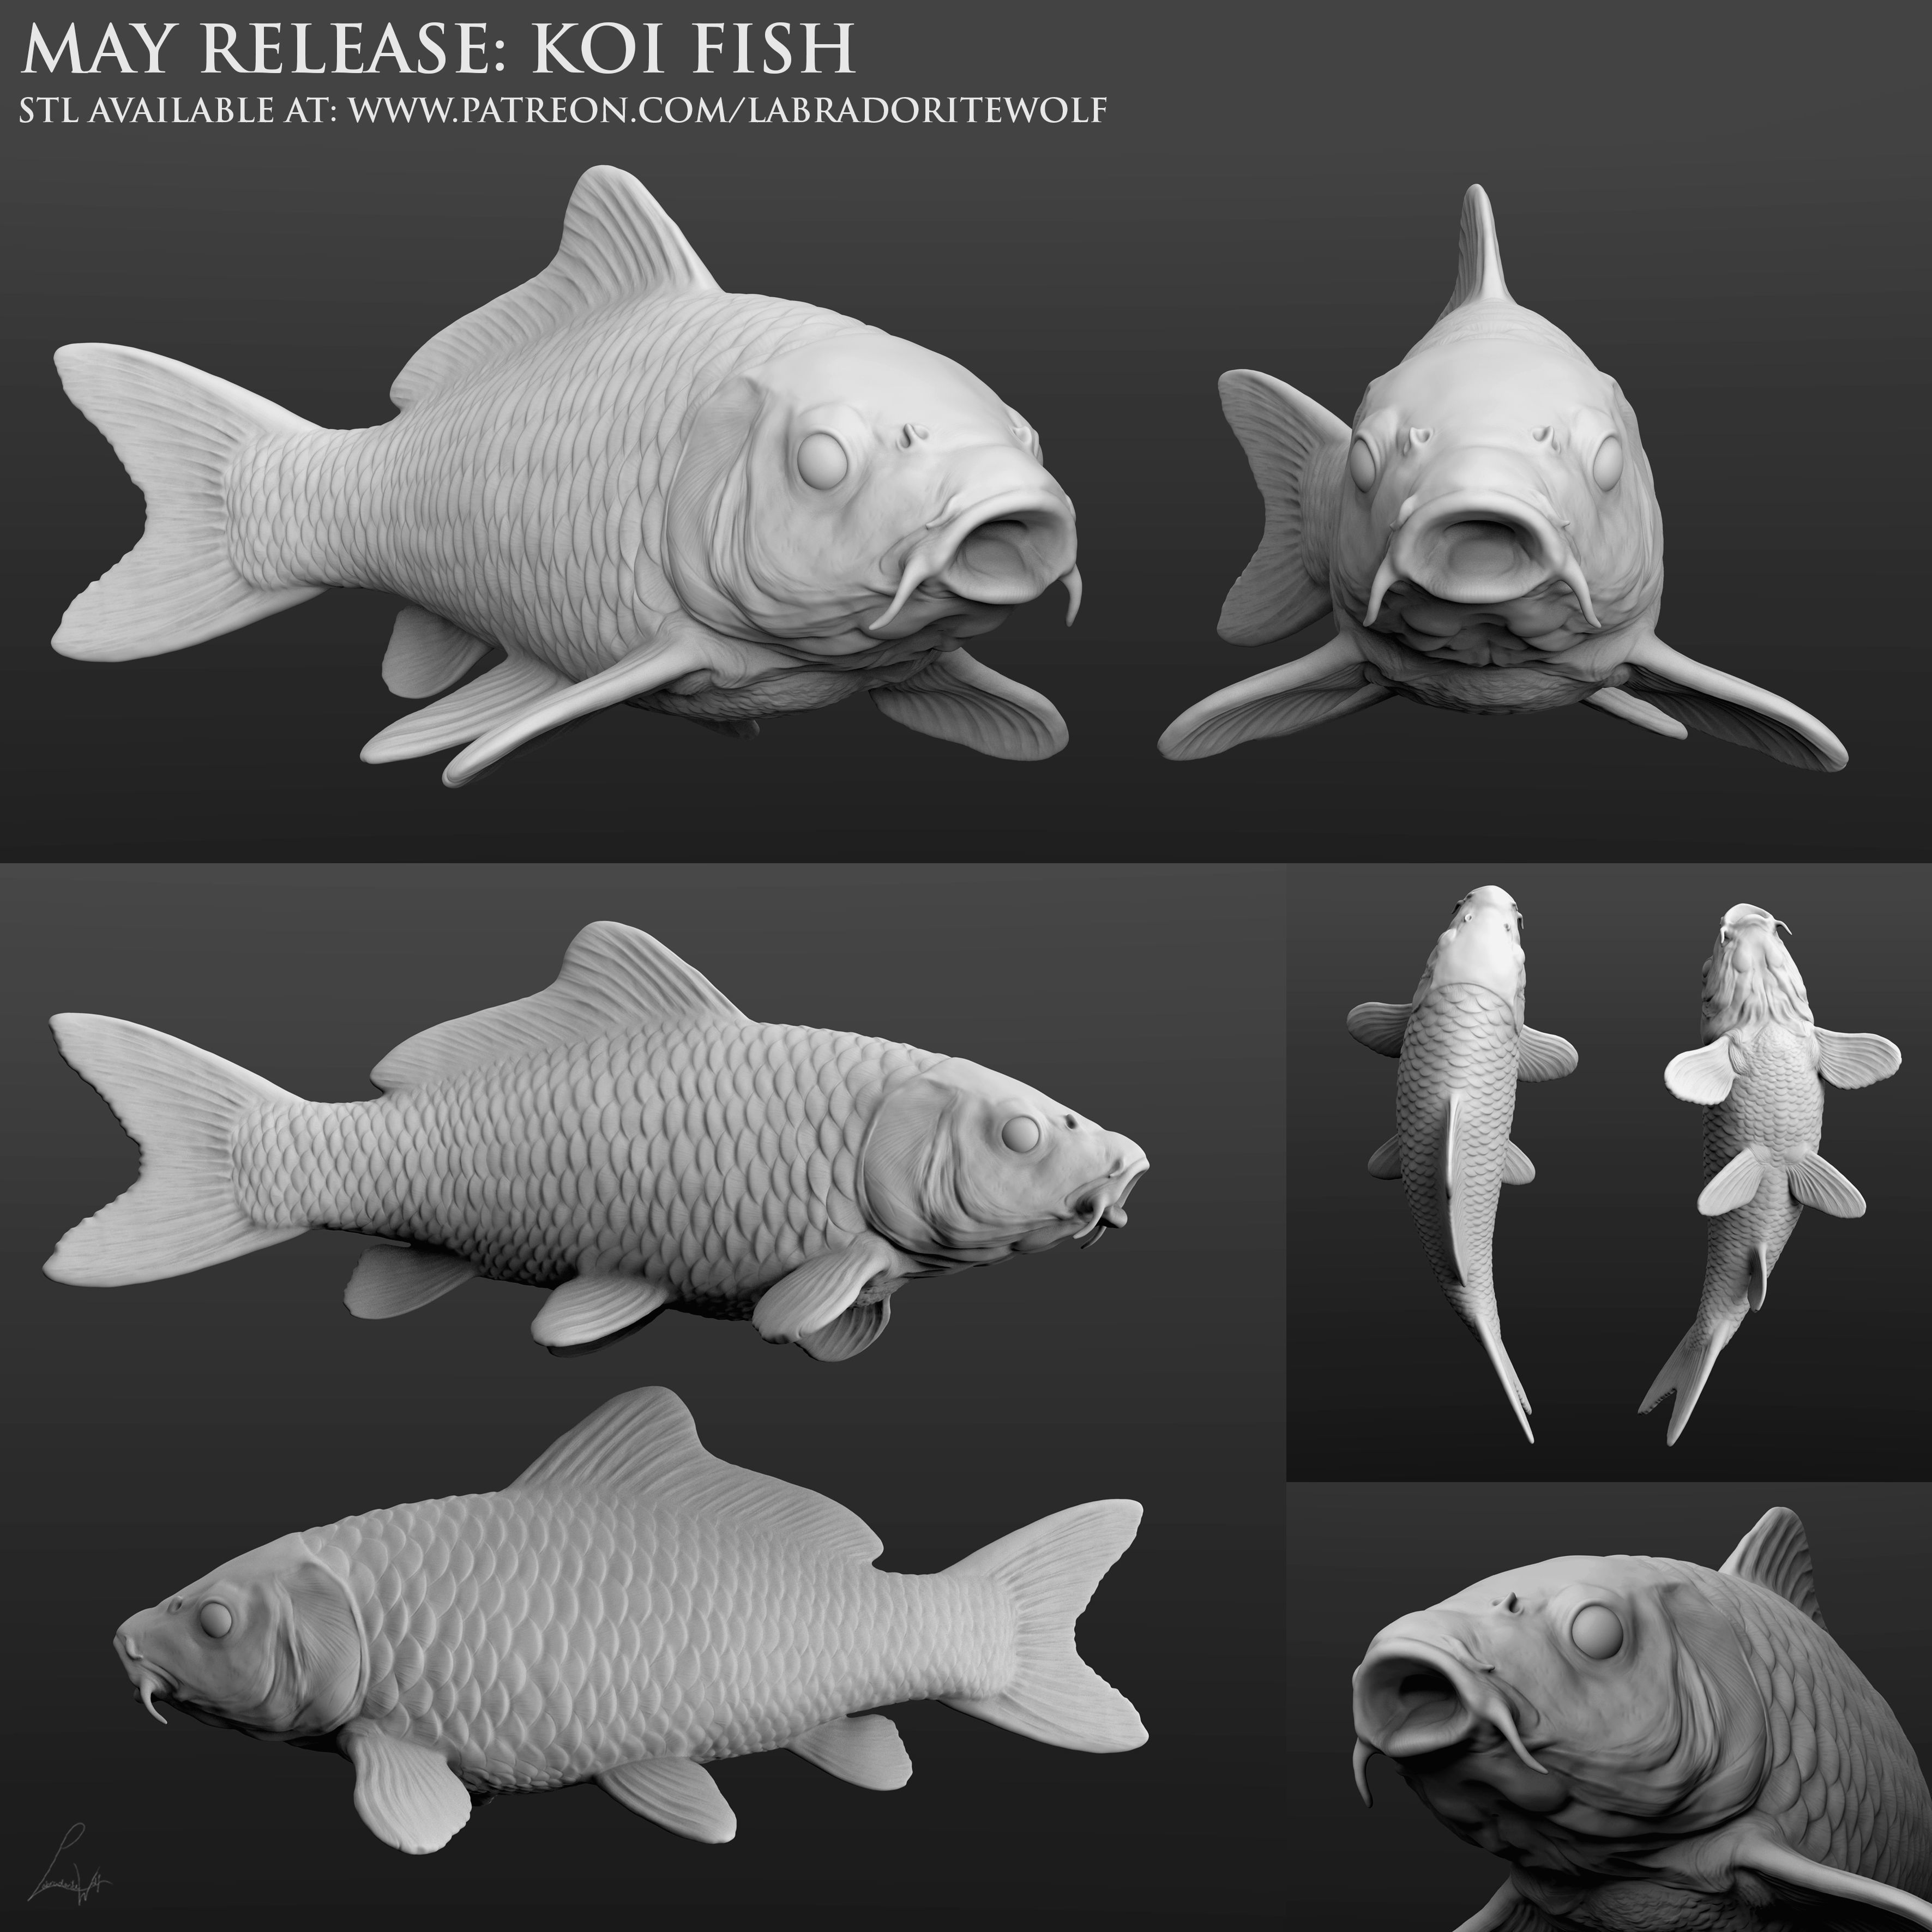
Here is an example of a fish model that illustrates what I'm talking about. Make uniform scales and apply them to a sculpted fish body.
https://img-new.cgtrader.com/...
Being able to wrap models around models at all axis would be incredibly useful for me. I have a lot of design ideas that I can't make because they require this.
What's it called ? What tutorials do I need ?


After re re re read the post body, I decided to trim down to only viable solutions.
You are not making monster dildo, aren't you? OP?
> Textured brush
There are two approaches if you for some reason want to manually place scales on the egg, one by one. You make alpha map or VDM of the scale and use that to stamp on to the egg. Alpha map is a grayscale map with value applying to strength of sculpt brush. VDM is similar but instead of only height in one direction (normal, the direction facing directly away from surface) you have 3D shape you can glue on with sculpt brush e.g. sticking a goat horn on a head. You get more detail this way.
pros:
relatively easy
intuitive
moderate control
decent result (with time spent)
cons:
requires bump map or VDM (paid/free download of maps exist)
super tedious if you have hundreds to stamp but can be speed up if you make a map containing multiple scales you can stamp at once
keywords:
sculptVDMalpha mapbrush textureanchored strokestencil-- recommended for low density
> Geometry node
The toy of Blender freaks. Imagine using pure math or programming to decide how scales are placed. You do the hard part once and you can put any scale (not just scales) on any egg (not just eggs), ad infinitum. Once they are arranged neatly, or not, up to you, you can then merge (boolean) it to your base egg to make a watertight model you can print. Since printing will go through slicing step, topology can be absolute trash and they will probably print just fine. It offer most versatility. Unlimited shape variation, slight randomness, adjust size to be bigger / smaller in some area, overlapping, you name it (the same thing donut man did with sprinkles, but on steroid).
You can use UV map with this to give it 2D vector information to use in whatever logic you need. For example, the tangent information to differentiate which direction the scales point to on different area of the egg, however there are easier way to control that.
pros:
ultimate control
great result (with enough skill)
extremely reusable (with enough skill)
cons:
extreme learning curve
upfront time investment
keywords:
geometry node-- recommended for lunatics
> Tissue addon
https://extensions.blender.org/add-ons/tissue/
This is probably the middle point, output quality wise, between textured brush and geometry node. It reduce the tedious part of those methods. You won't get the same amount of controls as Geometry node but it is waaaaaayyyyy faster than both. I think I have seen a more up to date fork of this addon, I might be wrong.
pros:
fast, very fast
easy
good amount of control
great result
cons:
some learning curve
keywords:
tissue addon-- highly recommended
note:
https://projects.blender.org/...
Important Core rules of 3D print model still apply. If the method you choose creates loose meshes, you still have to make it print-ready.
save